> ## Documentation Index
> Fetch the complete documentation index at: https://docs.haiqu.ai/llms.txt
> Use this file to discover all available pages before exploring further.
# Circuit Analytics
> Analyze your circuits with Haiqu SDK
Quantum circuit analysis is important for understanding the structure, complexity, and feasibility of executing a circuit on quantum hardware or simulators. It helps to identify key properties such as gate composition, depth, connectivity, and noise susceptibility, which impact performance and accuracy.
Haiqu SDK provides a number of analytics functions, properties and widgets:
| Property or Function | Description |
| :-------------------------------- | :-------------------------------------------------------------------------------- |
| `haiqu_circuit.analytics` | Provides ALL raw metrics data, represented as Python objects. |
| `haiqu_circuit.core_metrics()` | Renders a widget that displays a table of core analytics metrics. |
| `haiqu_circuit.compare_metrics()` | Renders a widget with a comparison table of core analytics for provided circuits. |
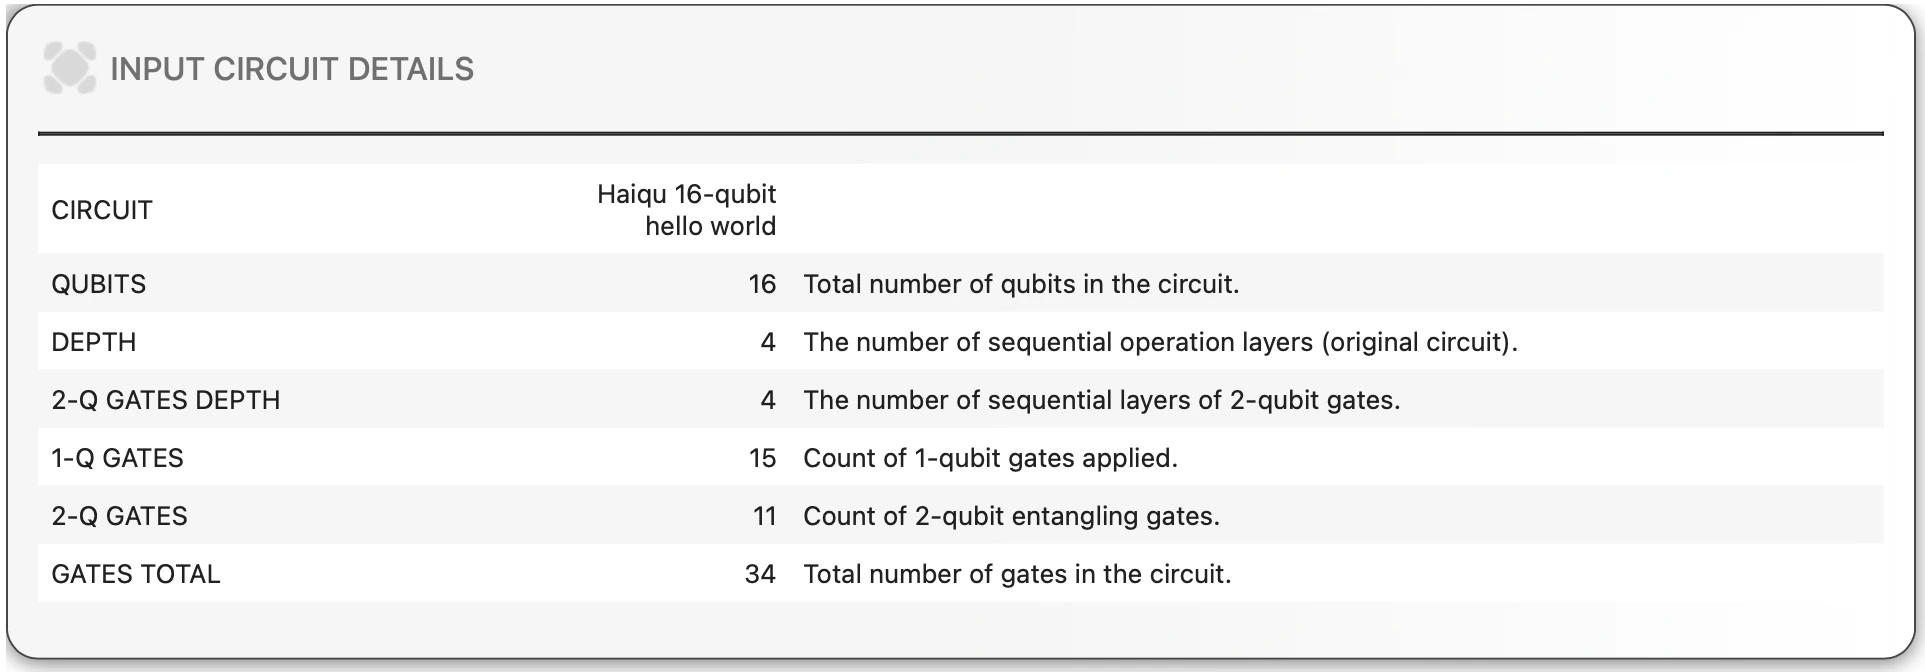
Each analytics widget includes built-in help for the displayed metrics, turned on with `help=True` option. Whenever possible, the widget displays a column to provide assistance for each metric. Data can be exported in formats including JSON, CSV, or used in Pandas for further analysis.
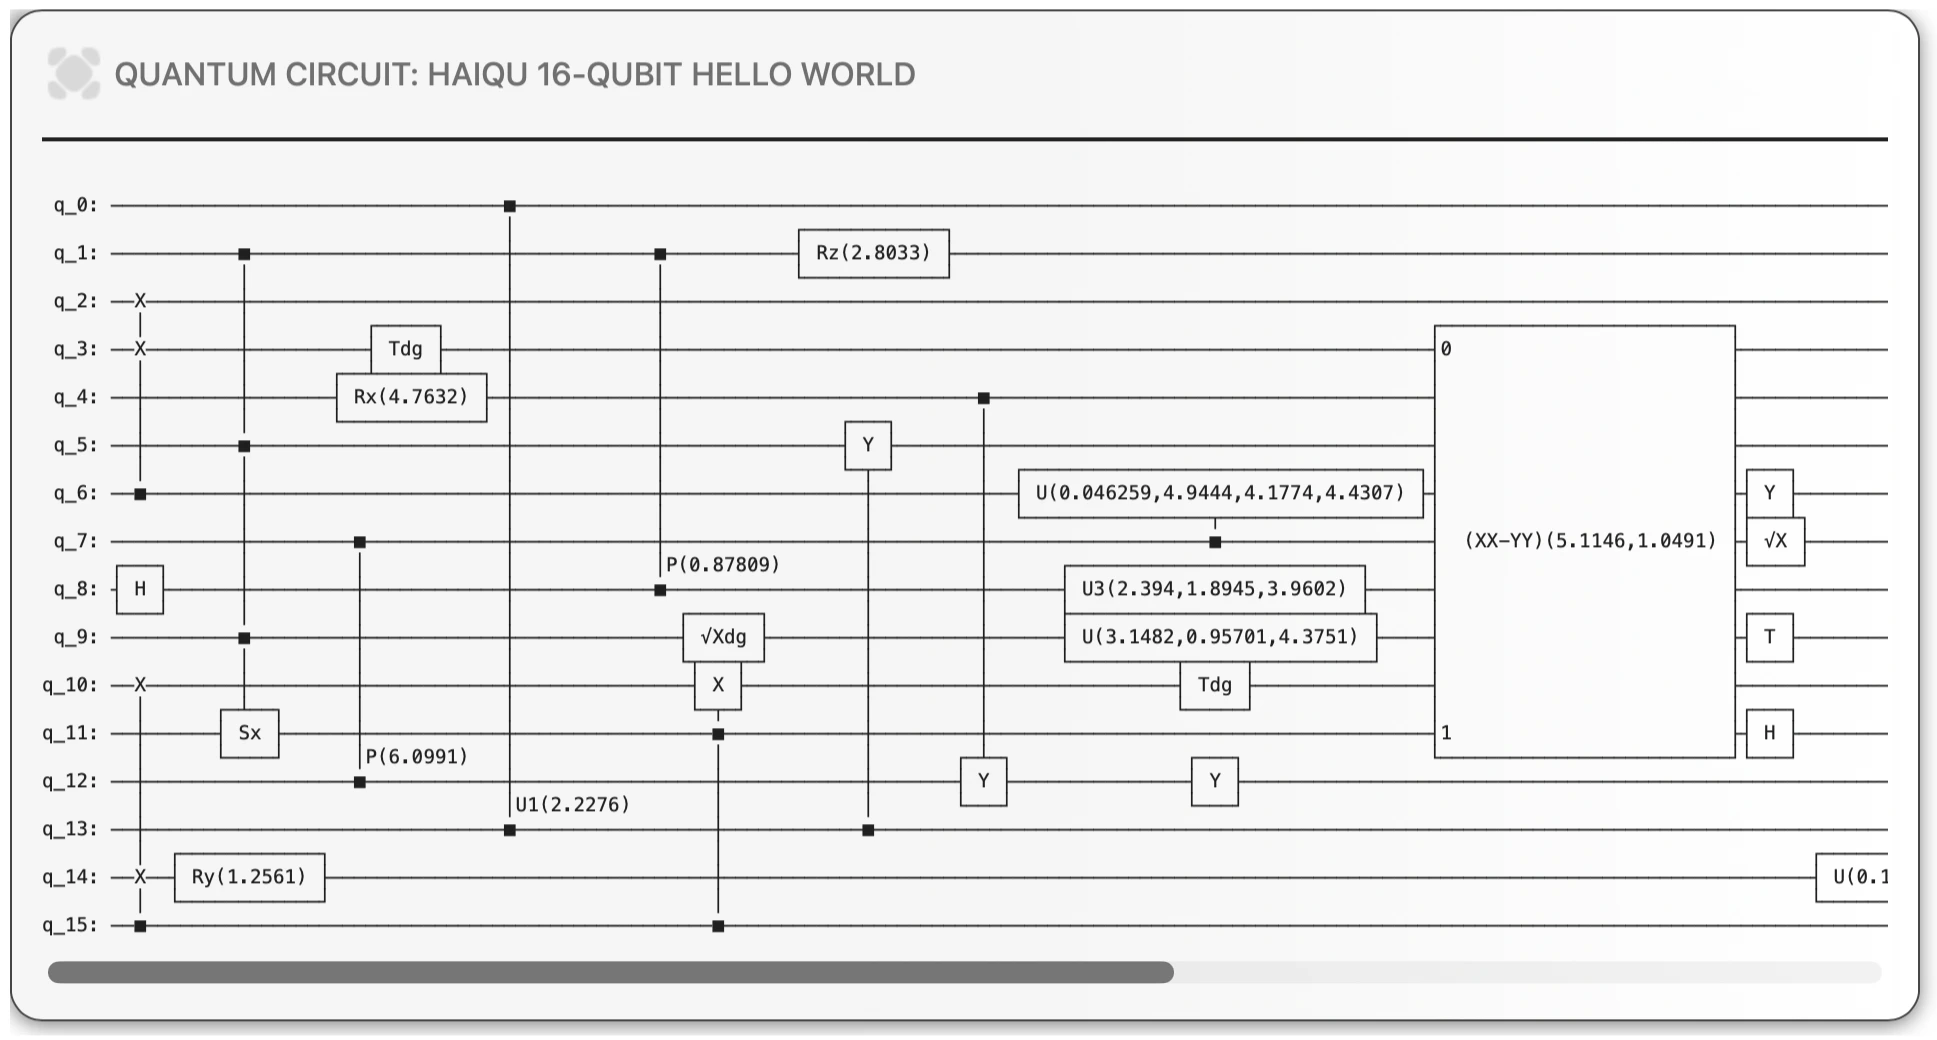
Let's start by defining an example quantum circuit, then display it:
```python theme={null}
from qiskit.circuit.random import random_circuit
# Generate a random quantum circuit with the following parameters:
circuit = random_circuit(
num_qubits=16, # Total number of qubits in the circuit (16-qubit system)
depth=4, # The number of gate layers applied
max_operands=4, # Maximum number of qubits any multi-qubit gate can act on
seed=42, # Random seed for reproducibility (ensures same circuit structure on each run)
measure=False # Do not include measurement operations at the end of the circuit
)
# Assign a name to the circuit for easy identification
circuit.name = "Haiqu 16-qubit hello world"
# Display the generated circuit
haiqu.draw(circuit)
```
 To utilize the analytics functions invoke the `haiqu.log()` method. This computes the complete set of quantum metrics using the Haiqu API and returns them in a single metadata object.
Let's submit our `circuit` to the Haiqu quantum backend for analysis:
```python theme={null}
haiqu_circuit = haiqu.log(circuit)
```
## Basic analysis
Before executing a quantum circuit, it is crucial to assess its fundamental properties to ensure feasibility and compatibility with available simulators or hardware. This step helps determine circuit size, gate composition, and whether it contains custom or unsupported operations. By analyzing these factors, users can make informed decisions about device selection, potential optimizations, and whether additional modifications are needed before execution.
The circuit's basic metrics are displayed using `core_metrics`:
```python theme={null}
haiqu_circuit.core_metrics(help=True)
```
To utilize the analytics functions invoke the `haiqu.log()` method. This computes the complete set of quantum metrics using the Haiqu API and returns them in a single metadata object.
Let's submit our `circuit` to the Haiqu quantum backend for analysis:
```python theme={null}
haiqu_circuit = haiqu.log(circuit)
```
## Basic analysis
Before executing a quantum circuit, it is crucial to assess its fundamental properties to ensure feasibility and compatibility with available simulators or hardware. This step helps determine circuit size, gate composition, and whether it contains custom or unsupported operations. By analyzing these factors, users can make informed decisions about device selection, potential optimizations, and whether additional modifications are needed before execution.
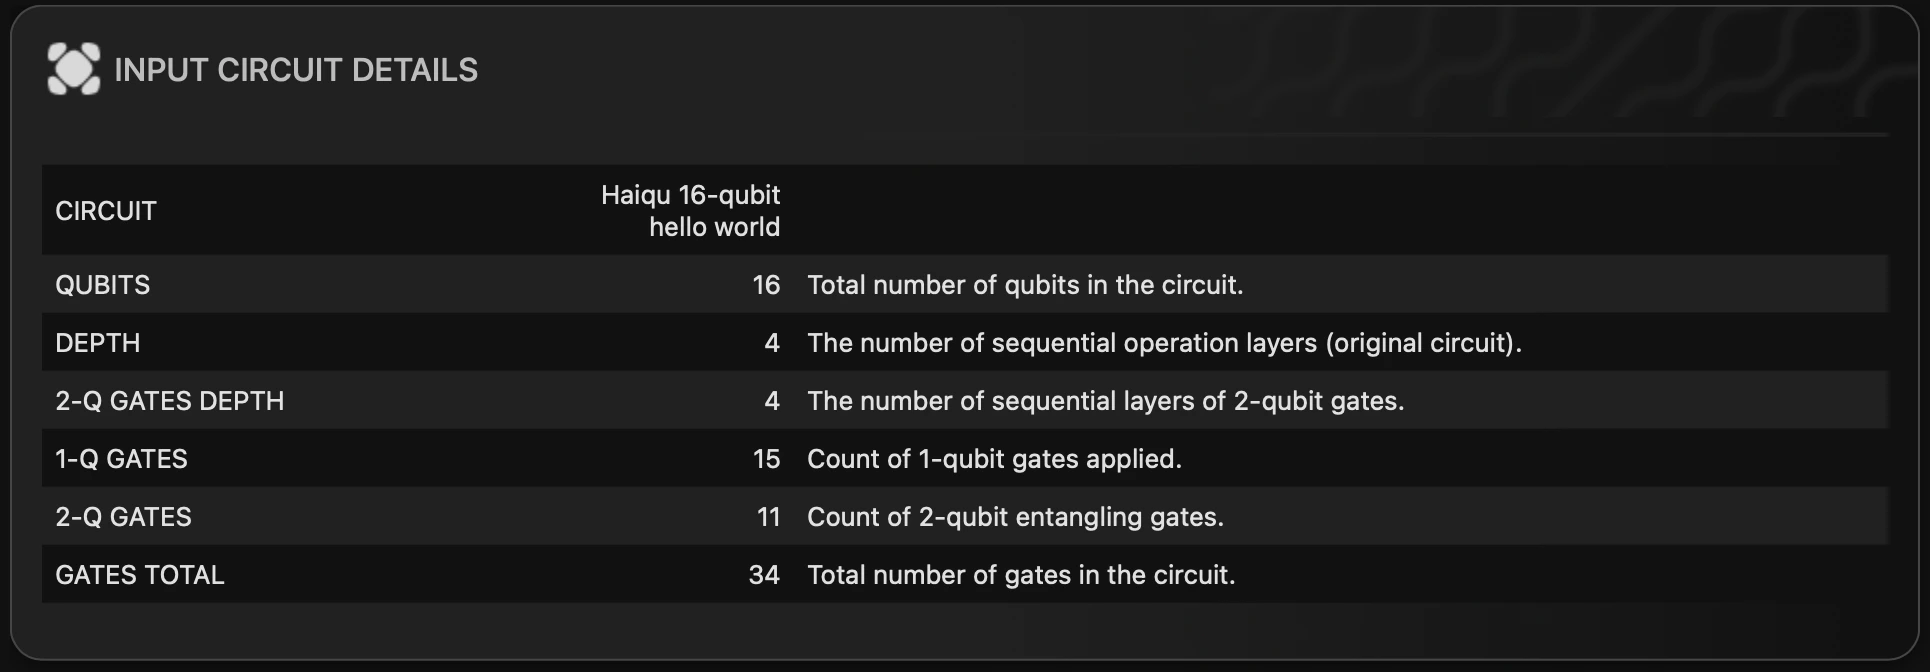
The circuit's basic metrics are displayed using `core_metrics`:
```python theme={null}
haiqu_circuit.core_metrics(help=True)
```
 To use this function in a terminal or a script and get metrics as a dictionary, use it with the `widget=False` parameter:
```python theme={null}
haiqu_circuit.core_metrics(widget=False)
>>> {'qubits': 8,
'num_parameters': 0,
'depth': 5,
'depth_2q': 4,
'gates_1q': 1,
'gates_2q': 7,
'other_gates': 8,
'gates_total': 16,
'other_ops': 8,
'instructions_total': 24}
```
## Accessing metrics directly
Let's submit the example quantum circuit for analysis:
```python theme={null}
from qiskit.circuit.random import random_circuit
qc = random_circuit(num_qubits=8, depth=5, max_operands=4, measure=True)
haiqu_circuit = haiqu.log(qc, name="Example Circuit")
```
Now the metrics could be accessed as regular Python objects.
To access the number of qubits, use:
```python theme={null}
haiqu_circuit.analytics.qubits
>>> 8
```
To access the depth of circuit, use:
```python theme={null}
haiqu_circuit.analytics.depth
>>> 5
```
And so on.
## Display a breakdown of the different gate types present in the circuit
To access the number of operations with the details for each of the gate type, use:
```python theme={null}
haiqu_circuit.analytics.operations_counts
>>> {'measure': 8,
'cswap': 4,
'rccx': 2,
'sdg': 2,
'z': 2,
's': 1,
'dcx': 1,
'u3': 1,
'cu': 1,
'rxx': 1,
'x': 1,
'rzz': 1,
'cp': 1,
'p': 1,
'xx_plus_yy': 1,
'sx': 1}
```
## Comparing circuits
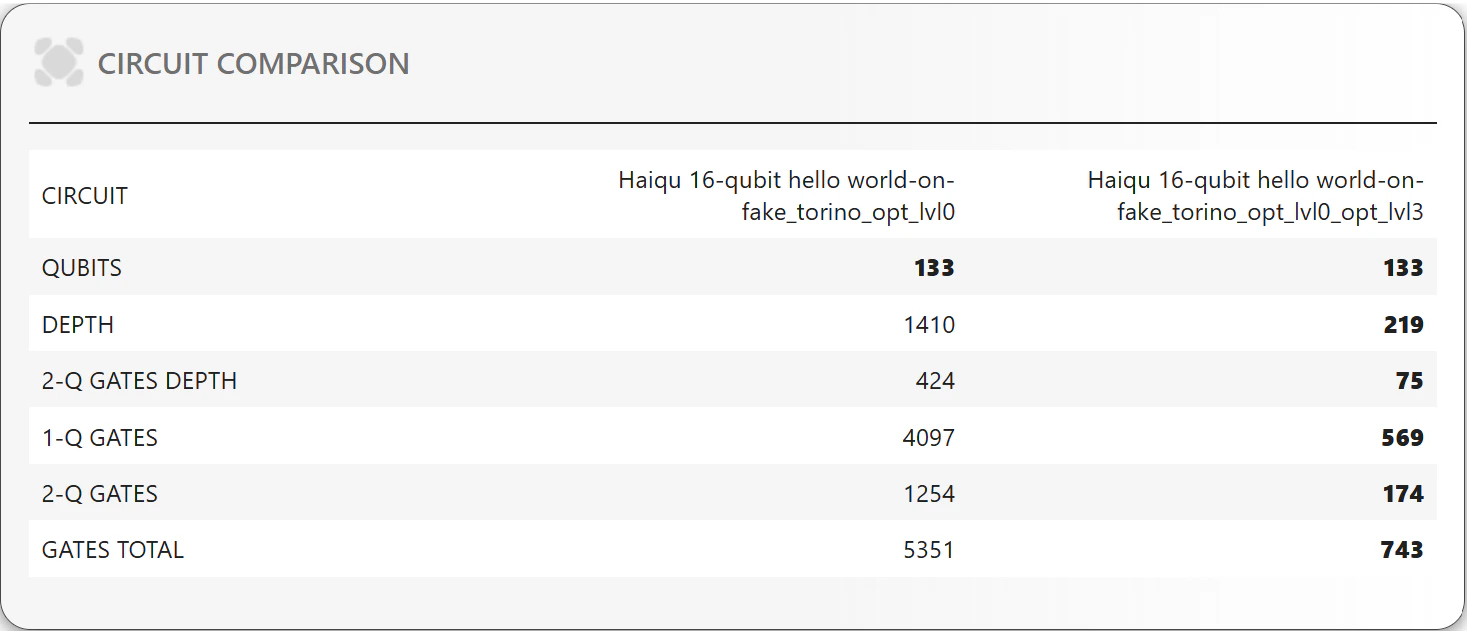
The function `haiqu.compare_metrics` shows a table with the core metrics of several circuits. This can be useful to understand the difference between the circuits or how a circuit changes with respect to a parameter.
```python theme={null}
haiqu.compare_metrics(circuit1, circuit2, ...)
```
For instance, the following example compares two circuits obtained as a transpilation of the same initial circuit but with different options:
```python theme={null}
transpiled_circuit_opt0 = haiqu.transpile(circuit, device, optimization_level=0)
transpiled_circuit_opt3 = haiqu.transpile(circuit, device, optimization_level=3)
haiqu.compare_metrics(transpiled_circuit_opt0, transpiled_circuit_opt3)
```
To use this function in a terminal or a script and get metrics as a dictionary, use it with the `widget=False` parameter:
```python theme={null}
haiqu_circuit.core_metrics(widget=False)
>>> {'qubits': 8,
'num_parameters': 0,
'depth': 5,
'depth_2q': 4,
'gates_1q': 1,
'gates_2q': 7,
'other_gates': 8,
'gates_total': 16,
'other_ops': 8,
'instructions_total': 24}
```
## Accessing metrics directly
Let's submit the example quantum circuit for analysis:
```python theme={null}
from qiskit.circuit.random import random_circuit
qc = random_circuit(num_qubits=8, depth=5, max_operands=4, measure=True)
haiqu_circuit = haiqu.log(qc, name="Example Circuit")
```
Now the metrics could be accessed as regular Python objects.
To access the number of qubits, use:
```python theme={null}
haiqu_circuit.analytics.qubits
>>> 8
```
To access the depth of circuit, use:
```python theme={null}
haiqu_circuit.analytics.depth
>>> 5
```
And so on.
## Display a breakdown of the different gate types present in the circuit
To access the number of operations with the details for each of the gate type, use:
```python theme={null}
haiqu_circuit.analytics.operations_counts
>>> {'measure': 8,
'cswap': 4,
'rccx': 2,
'sdg': 2,
'z': 2,
's': 1,
'dcx': 1,
'u3': 1,
'cu': 1,
'rxx': 1,
'x': 1,
'rzz': 1,
'cp': 1,
'p': 1,
'xx_plus_yy': 1,
'sx': 1}
```
## Comparing circuits
The function `haiqu.compare_metrics` shows a table with the core metrics of several circuits. This can be useful to understand the difference between the circuits or how a circuit changes with respect to a parameter.
```python theme={null}
haiqu.compare_metrics(circuit1, circuit2, ...)
```
For instance, the following example compares two circuits obtained as a transpilation of the same initial circuit but with different options:
```python theme={null}
transpiled_circuit_opt0 = haiqu.transpile(circuit, device, optimization_level=0)
transpiled_circuit_opt3 = haiqu.transpile(circuit, device, optimization_level=3)
haiqu.compare_metrics(transpiled_circuit_opt0, transpiled_circuit_opt3)
```